You set this up on the host server that is running kvm. You need to create a bridge so that the VMs can roam around outside this box, and hit your router/pfsense/etc and be exposed on your network (also: the VMs will get a DHCP address this way, instead of their assigned 192.168... address)
Warning: you should have 2 Ethernet ports, like eno1 and eno2, connect via eno1, and set up a bridge on eno2, otherwise when you set up the bridge you can get locked out, and you can only continue with the setup from a console directly on the server. Good luck typing yaml in, manually at the console
in your computer closet.
In this example, I'm using ssh user@eno1-ip-address, and I'm setting up the bridge on eno2, the second Ethernet port.
# be root
sudo su
apt install netplan.io
apt install openvswitch-switch-dpdk
# create the br0 bridge:
ip link add br0 type bridge
# show it
ip link show type bridge
# check your network interface
ifconfig
# we have 2 on this system, eno1 and eno2. We'll create the bridge on eno2
ip link set eno2 master br0
ip link show master br0
# assign a static ip to it
ip address add dev br0 10.1.10.17/24
ip addr show br0
# add bridges: section below for br0:
nano /etc/netplan/00-installer-config.yaml
# This is the network config written by 'subiquity'
network:
ethernets:
eno1:
dhcp4: true
eno2:
dhcp4: true
version: 2
bridges:
br0:
interfaces: [eno2]
addresses: [10.1.20.1/24]
# replaced by routes: gateway4: 10.1.10.1
routes:
- to: default
via: 10.1.10.1
mtu: 1500
nameservers:
addresses: [8.8.8.8]
parameters:
stp: true
forward-delay: 4
dhcp4: no
netplan generate
netplan apply
# Useful video: https://www.youtube.com/watch?v=P-PbTBGF3-g
# check to see the new bridge:
ifconfig
br0: flags=4163<UP,BROADCAST,RUNNING,MULTICAST> mtu 1500
inet 10.1.20.1 netmask 255.255.255.0 broadcast 10.1.20.255
inet6 fe80::c4c7:93ff:fe95:ce0d prefixlen 64 scopeid 0x20<link>
ether c6:c7:93:95:ce:0d txqueuelen 1000 (Ethernet)
RX packets 24 bytes 2580 (2.5 KB)
RX errors 0 dropped 0 overruns 0 frame 0
TX packets 9 bytes 814 (814.0 B)
TX errors 0 dropped 0 overruns 0 carrier 0 collisions 0
# Disable netfilter for the bridge: https://linuxconfig.org/how-to-use-bridged-networking-with-libvirt-and-kvm
# create a new file
nano /etc/sysctl.d/99-netfilter-bridge.conf
# with contents:
net.bridge.bridge-nf-call-ip6tables = 0
net.bridge.bridge-nf-call-iptables = 0
net.bridge.bridge-nf-call-arptables = 0
# run
modprobe br_netfilter
# auto load, create a new file:
nano /etc/modules-load.d/br_netfilter.conf
# with contents:
br_netfilter
# load it
sysctl -p /etc/sysctl.d/99-netfilter-bridge.conf
# create a virtual network based on br0
nano /root/bridged-network.xml
# with contents:
<network>
<name>bridged-network</name>
<forward mode="bridge" />
<bridge name="br0" />
</network>
# load it
virsh net-define /root/bridged-network.xml
# activate it
virsh net-start bridged-network
virsh net-autostart bridged-network
# list it
sudo virsh net-list
Name State Autostart Persistent
----------------------------------------------------
bridged-network active yes yes
default active yes yes
# looks good
# If you have issues after reboot and the network does not work,
# (ex: in debian) and you have to manually go to the server and at
# the console issue "netplan apply", then you can automate this by
# adding a new .sh file in /root/netplanapply.sh with contents:
#!/bin/bash
/usr/sbin/netplan apply
# and chmod u+x /root/netplanapply.sh
# and crontab -e as root, and add:
@reboot /root/netplanapply.sh
# to run this every time after reboot. I had to do this.
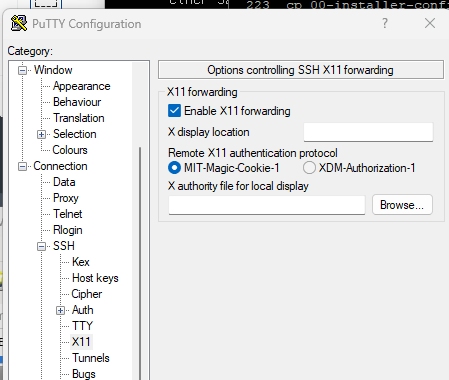
# In this example we use virt-manager, the gui, instead of shell commands. By the way, in in Windows you can use xming as a windows manager, and putty to your server and all you need to set is "Enable X11 forwarding":
# next, in virt-manager, make the VM use the bridge br0 by specifying the virtual name: bridged-network

# start up the virt namanger:
virt-manager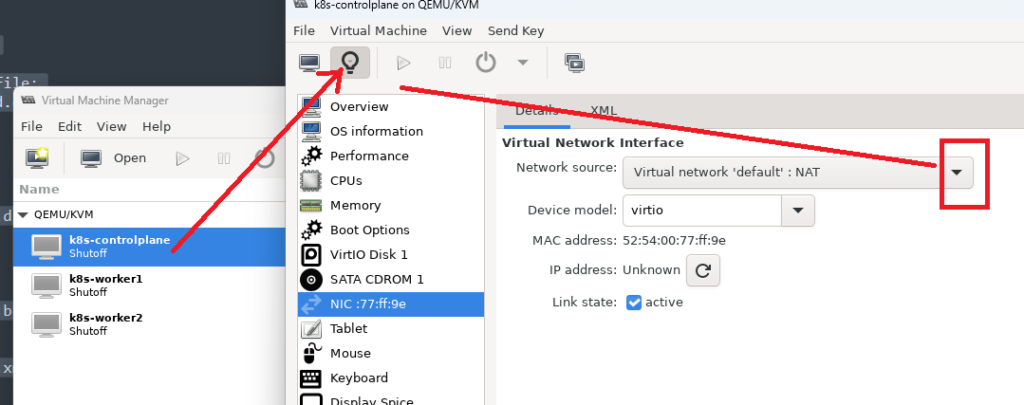
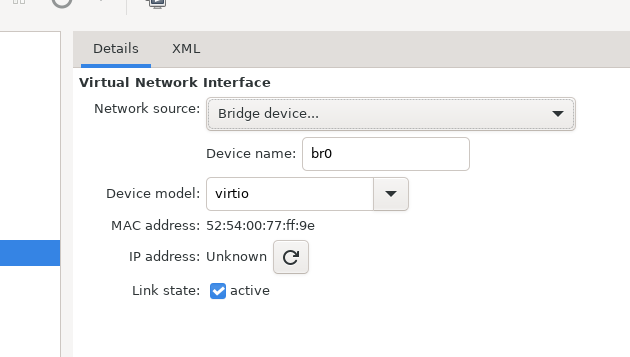
change it from NAT to your newly defined bridge, br0:
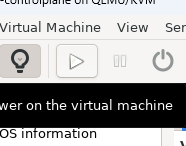
And start the VM
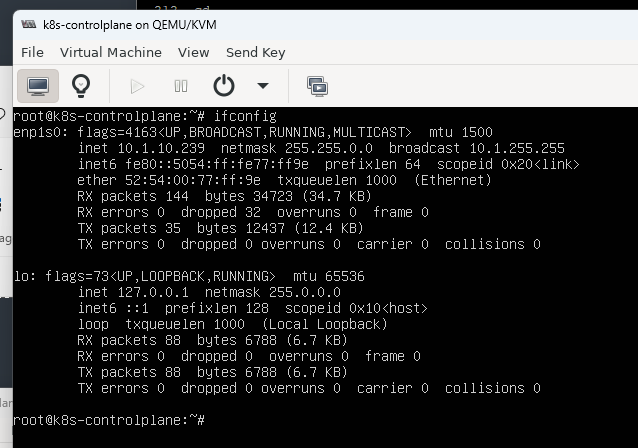
After the VM is started, run ifconfig and you’ll see the DHCP address from your network’s router or pfsense, etc.
In this case it’s: 10.1.10.239 – Get the ether hardware IP and set up your own static IP rules, etc.
Good luck.